After CRUD: Practical DevOps for side projects
August 4, 2019
If you've been following along with these posts, we're working towards full-time employment as a software developer. We started with making simple apps and exploring some concepts and tooling around those apps, and I wanted to do one more post on some technical skills to develop before we get into the softer skills like interviewing and finding your first job.
Up until this point we've dealt with the act of software engineering directly: the actual programming of the app, learning how apps communicate via APIs, and working with other developers by using Git.
In this post I want to cover some things around the administration and process of having a real production app. These skills are not just useful for any apps you have living in the wild, but they're also directly applicable to the job of a software engineer. Knowledge and skill in this area will bode well for you during the job search and interview process.
DevOps
One term for the topics in this post is DevOps (developer operations). These are items around the deployment, maintenance, and trouble-shooting of issues around a production application. It's the last leg of application development: putting that app out on the internet for other people to see and use.
While it may be the last step in the process it's definitely not unimportant or trivial. There are engineers who their entire jobs are to maintain the infrastructure (read: servers and applications) that keep our apps running smoothly. In smaller teams, the engineers who wrote the code usually also have the responsibility for keeping it up and running, but in larger companies this is sometimes delegated to an "ops" or infrastructure team.
Our goal here is not to delve too deep into the world of ops—but to get some familiarity with the tooling, processes, and language around running a production app. We'll rely on PaaS's (platform-as-a-service) companies to do all the real hard work. Our job is to configure and use these companies to get the result we want—a live, running production app. While it can be fun to play ops, playing ops for ops-sake is not our goal here (and not really the goal at a real place of employment either).
So with that said, let's begin! In this post I'll talk about three different things:
- Hosting
- Continuous integration / continuous deployment (CI/CD)
- Extras (monitoring, error tracking, etc)
Hosting
The first question is, what server is going to run your app? For 99.9% of cases, you just want to use a PaaS, or a company who's entire job is to host and secure applications. There's nothing wrong with taking on the hosting yourself, but if your goal is to become employed as quickly as possible, that time can better be used elsewhere. Also, there are teams of people who's entire jobs are to make sure applications are secure and stay up-to-date with crucial software patches. You open yourself up to a lot of security risk trying to do it on your own.
Heroku
If you've never deployed an app before, I recommend using Heroku. It's simple, free to start, and it will get you up and running in no time. They support essentially every modern web language and framework.
For the purpose of this article, I'm going to use the test app we made in the post on learning how to build APIs. If you want to practice some of the things in this post on your own it's also on Github here. It's a trivially-small app, but it will work great for these simple tasks.
At least for a Rails app, deploying to Heroku is so easy—granted I've already signed up for a Heroku account and installed the Heroku toolbelt already—but after that one-time setup, it's only a few simple commands to deploy my app and have it live on the internet.
First we need to create the app. We can do this by running heroku create in the terminal or by using the web interface at heroku.com. I gave mine the name blog-sample-api, but if you don't pass a name Heroku will generate a random one.
~/blog-api (master)$ heroku create blog-sample-api
Creating app... done, ⬢ blog-sample-api
https://blog-sample-api.herokuapp.com/ | https://git.heroku.com/blog-sample-api.git
Next we need to push our code from our local to Heroku. One of the things that happened when we ran heroku create was a new Git remote was added called heroku. We can see this by running git remote -v (-v for "verbose"):
~/blog-api (master)$ git remote -v
heroku    https://git.heroku.com/blog-sample-api.git (fetch)
heroku    https://git.heroku.com/blog-sample-api.git (push)
origin    git@github.com:johnmosesman/blog_sample_api.git (fetch)
origin    git@github.com:johnmosesman/blog_sample_api.git (push)
We can see we have the origin remote (Github) from the previous post, and now a new remote called heroku. Now we just need to push to that remote:
~/blog-api (master)$ git push heroku master
Enumerating objects: 81, done.
Counting objects: 100% (81/81), done.
Delta compression using up to 8 threads
Compressing objects: 100% (68/68), done.
Writing objects: 100% (81/81), 20.66 KiB | 2.58 MiB/s, done.
Total 81 (delta 1), reused 0 (delta 0)
remote: Compressing source files... done.
remote: Building source:
remote:

...

remote: -----> Launching...
remote:        Released v6
remote:        https://blog-sample-api.herokuapp.com/ deployed to Heroku
remote:
remote: Verifying deploy... done.
To https://git.heroku.com/blog-sample-api.git
 * [new branch]      master -> master
Running git push heroku master pushes all of our local commits (this is often missed by new developers—you push from your local environment) on the master branch to the new remote named heroku (remotes can be named anything—pizza, if you want. By default Heroku calls it "heroku").
And with just those few commands, we now have an app live on the internet! It's a silly app sure, but that is kind of impressive right? That's a real thing on the internet. You can send the app's URL to anyone in the world and they can view it.
And it does work: you can visit https://blog-sample-api.herokuapp.com/users.json. The only thing you'll probably see is an empty array, [], since there's no data in the database (but based on my previous post on APIs you could POST some data to it :)).
The only other thing I did was run heroku run rails db:migrate as I needed to migrate the database for my Rails API to fully work.
AWS
Another very common hosting provider is Amazon Webservices (AWS). While AWS is great, I wouldn't recommend it for absolute beginners. Start with Heroku and then if you want, migrate over to AWS. Many companies today use AWS as their hosting provider—so it's not a bad thing to know in the long-run—it just might be a little bit more than you want to bite off as a beginner. But hey, if you're feeling spicy—go for it!
Continuous integration / Continuous deployment (CI/CD)
Switching gears a bit, for the above app we did the git push manually, and then we had to again manually run heroku run rails db:migrate to migrate the database.
This is not ideal for a few reasons. One, we have to remember to run the migration command or our app will start erroring. We don't want to leave these kinds of things to human error. Also, it's annoying to have to type those commands to deploy every time. As software developers we like to automate everything we can. Why use human effort when a machine can do it correctly and automatically every time? And thus, continuous integration and continuous deployment were born.
Here's the idea behind continuous integration and continuous deployment: if the code is in a good and working state, why not continuously release those changes to the user any time they're ready? This is preferable to the approach of waiting and storing up changes for one big (possibly error-prone) release of several weeks or months of work.
In practical terms, ideally, every time we pushed our code back to origin (the source of truth for all developers on the project) on the master branch (the main branch) it would automatically deploy our application, and run any extra commands we might need like (like migrating the database). This is exactly what CI/CD is all about, and it's very easy to set up.
Nowadays most hosting providers like Heroku or AWS now have their own CI/CD pipelines, but there are also many other providers you can choose from: Codeship, Travis CI, or Circle CI. Most of these have a good free plan, so they're great for testing out this process for yourself.
Setting up Heroku deployment on Codeship
I'll use Codeship as an example. To setup the automatic deploy to Heroku, you just need to configure a few settings:
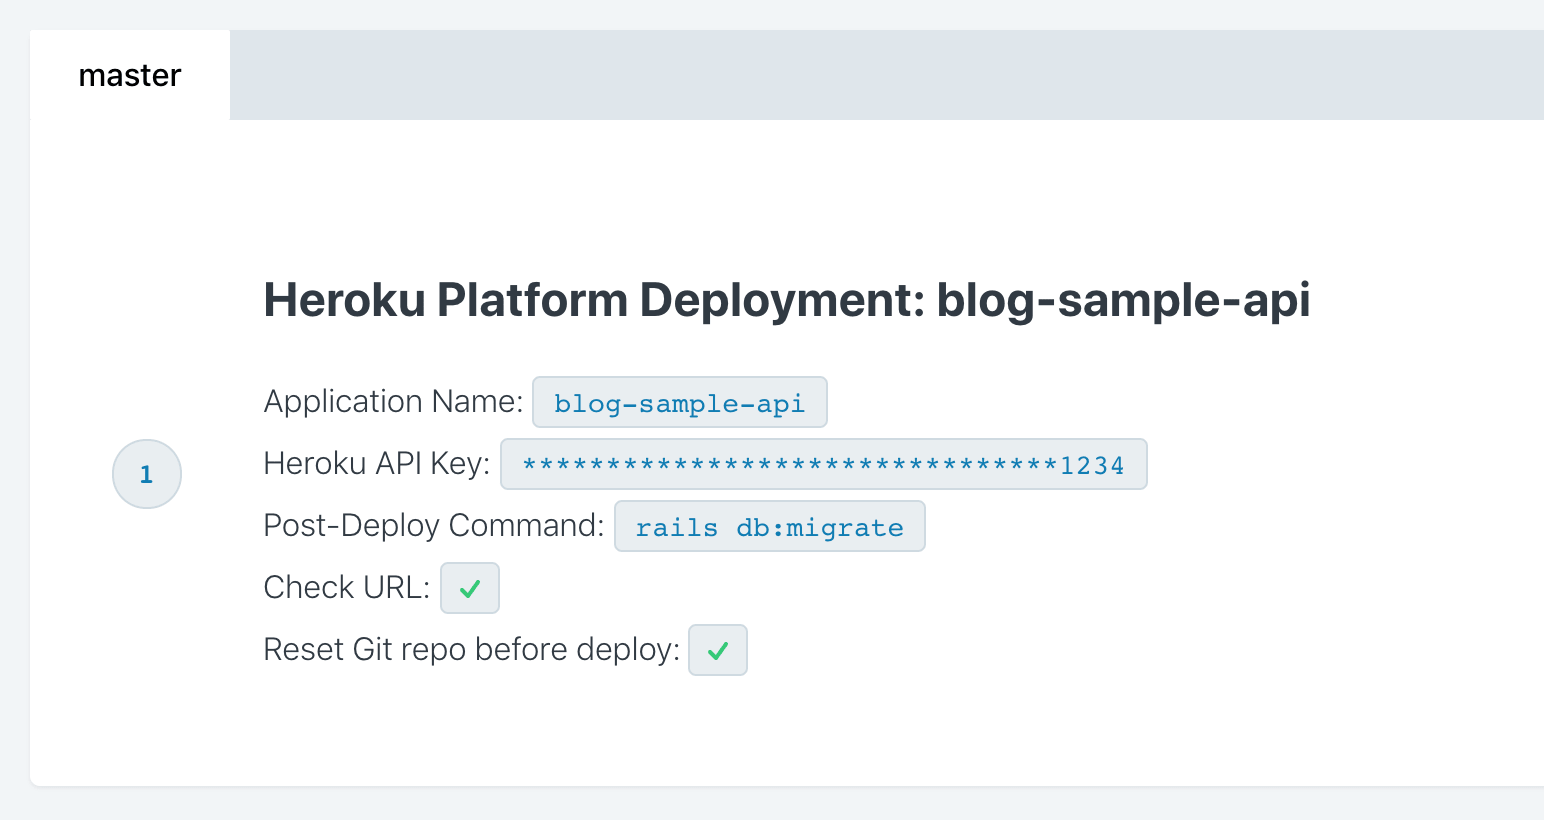
Now whenever something is committed to the master branch (notice "master" in the top-left corner of the image), it will automatically deploy the app. I also set the post-deploy command to rails db:migrate, so it will automatically migrate after every deploy.
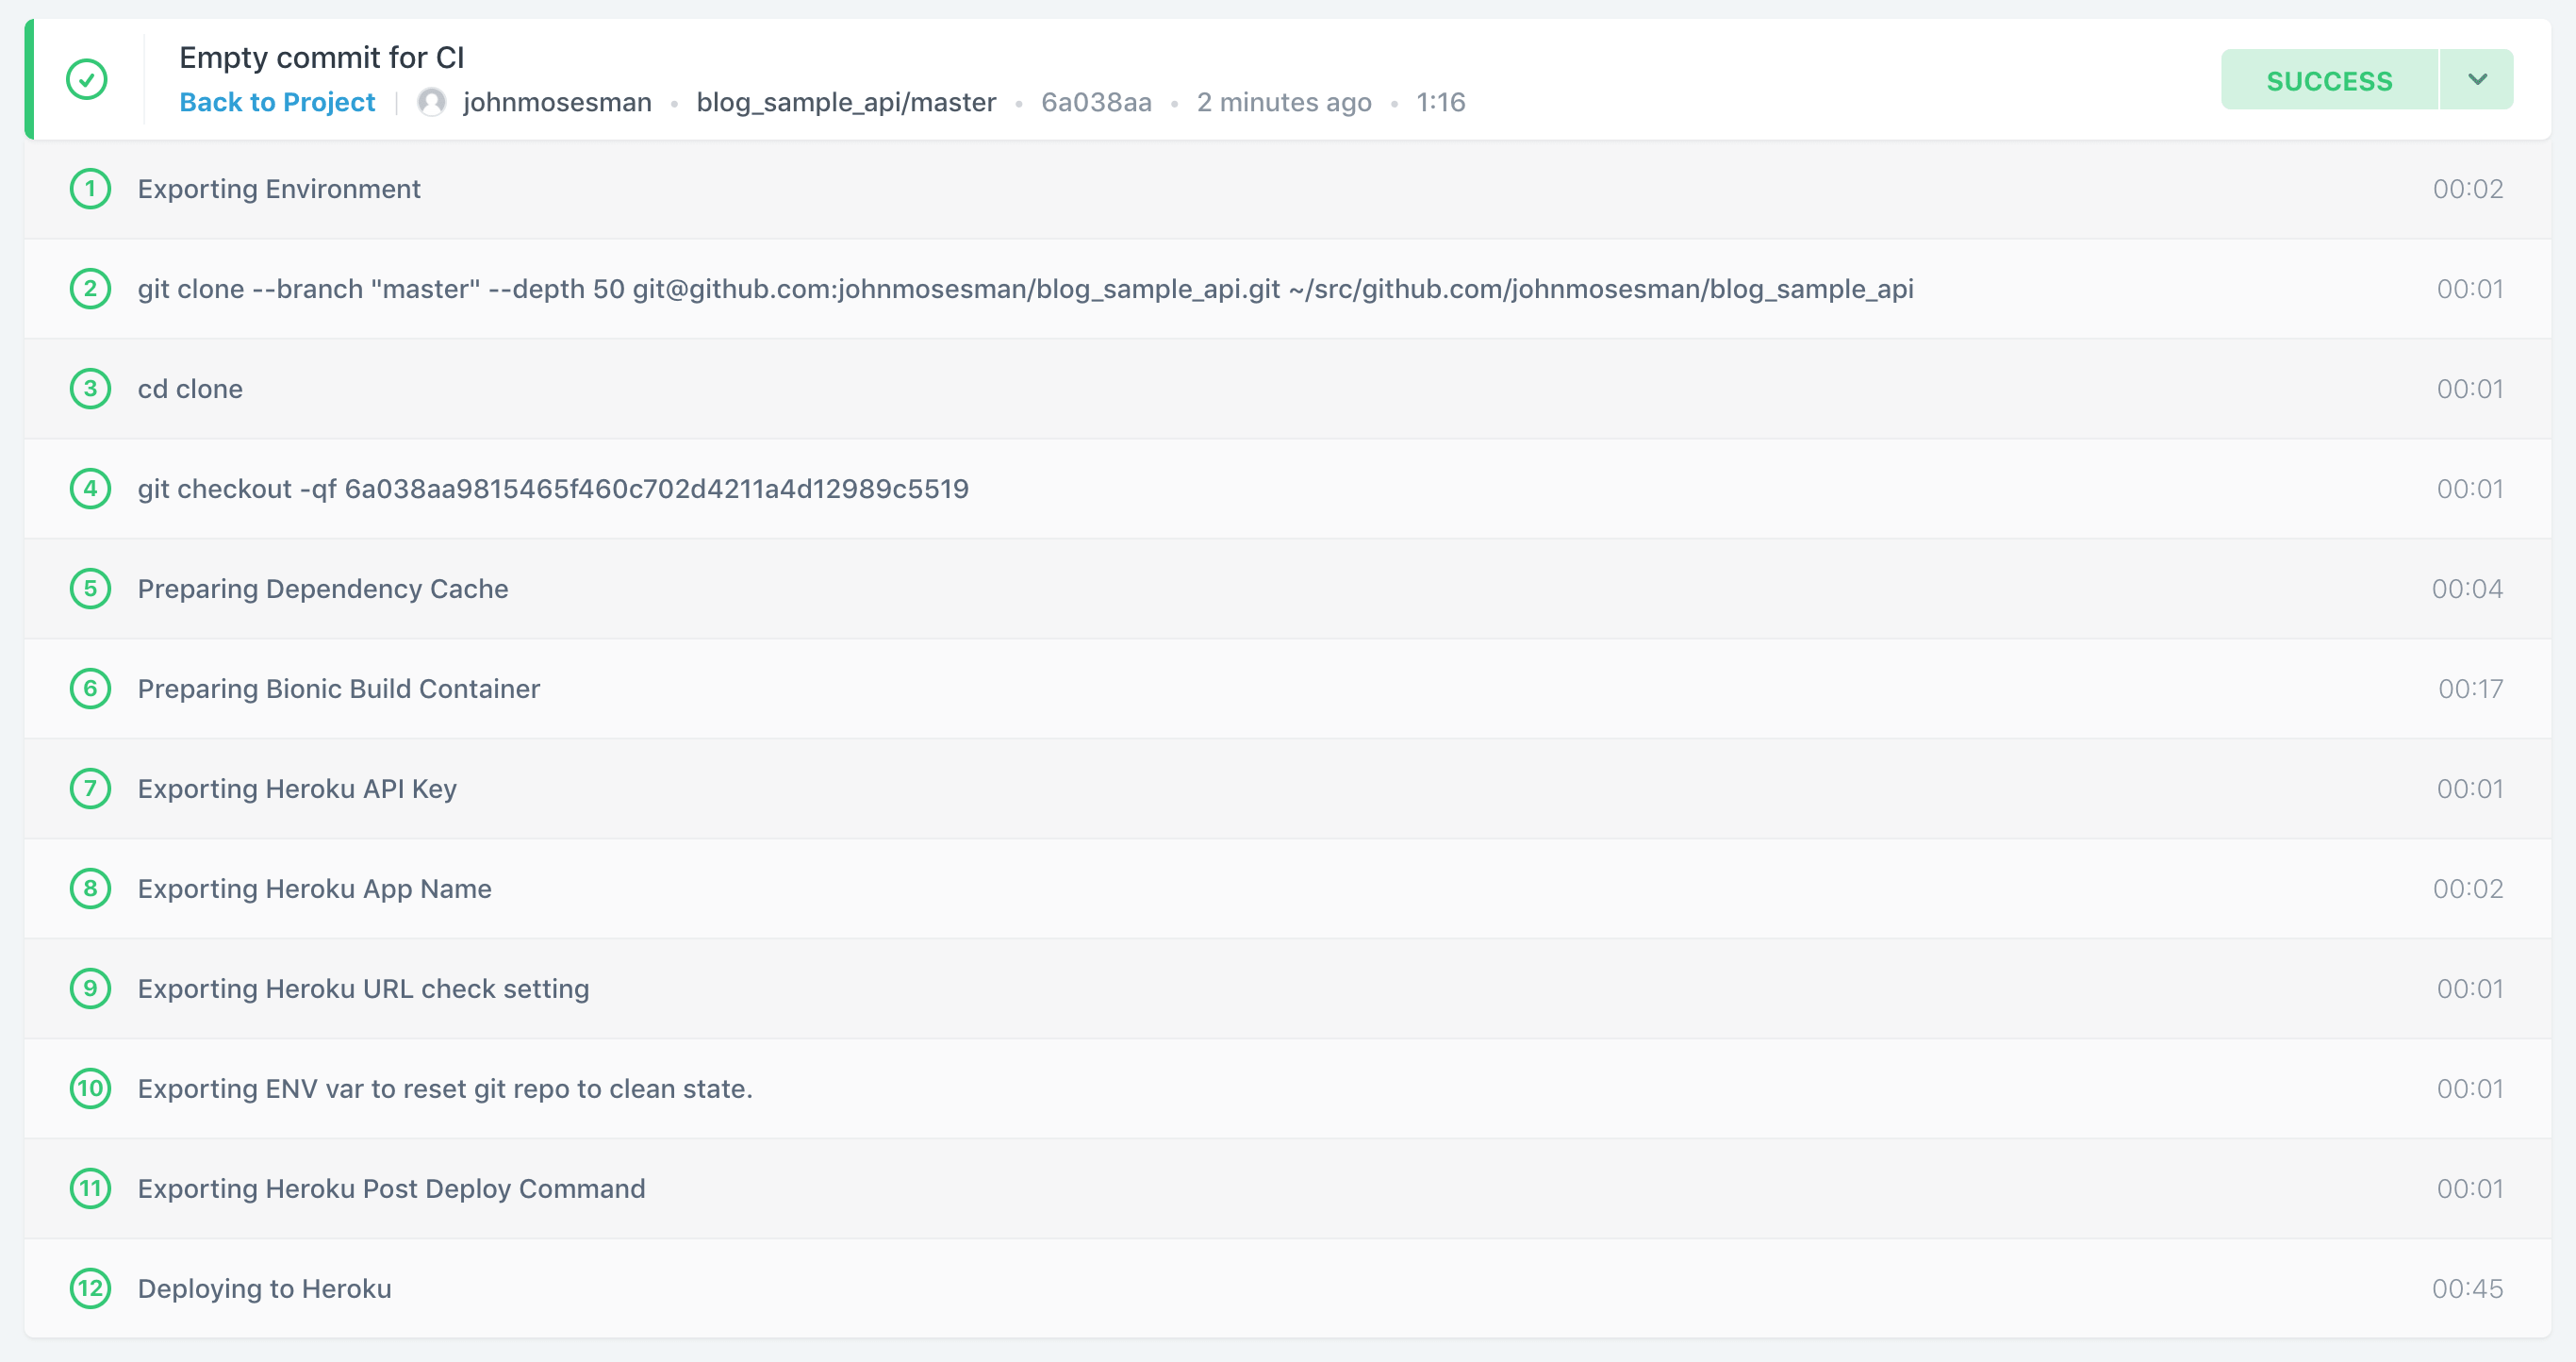
After a new commit (I used git commit --allow-empty -m "the-message" to make an empty commit) and pushing to origin master, you can see the build is running:

Right now there's not any other steps in the build (like running tests—which we'll see in the next section), so after setting up the build container (basically installing and setting up all the things you need to run the app locally yourself) it deploys the app and we're done!
Tests
Another common practice in CI/CD situations is to run your test suite before deploying.
If you're not familiar with a test suite, it's a collection of code or scripts that run through various parts of your app and make sure the app behavior is correct. This could be calling certain functions throughout the codebase to make sure a certain input returns a certain output, or it can even be booting up a virtual browser and triggering click events and filling out inputs to assert that the user flows work correctly.
Test suite are incredibly important, and we'll talk about them some time soon. A passing test suite instills a lot of confidence that the new code changes didn't cause any new errors or any previous errors to reoccur.
There are configuration options here, but usually your CI will run the test suite with every push back up to origin. It will also run the tests after merging branches.
If the merge is to a branch that would trigger a deployment (like master in our example above), if the build fails the deployment will be cancelled. That way you know that anything that gets deployed at least has a green test suite (not that a green test suite prevents all problems by any means—but we'll talk about testing soon enough).
Running tests on Codeship
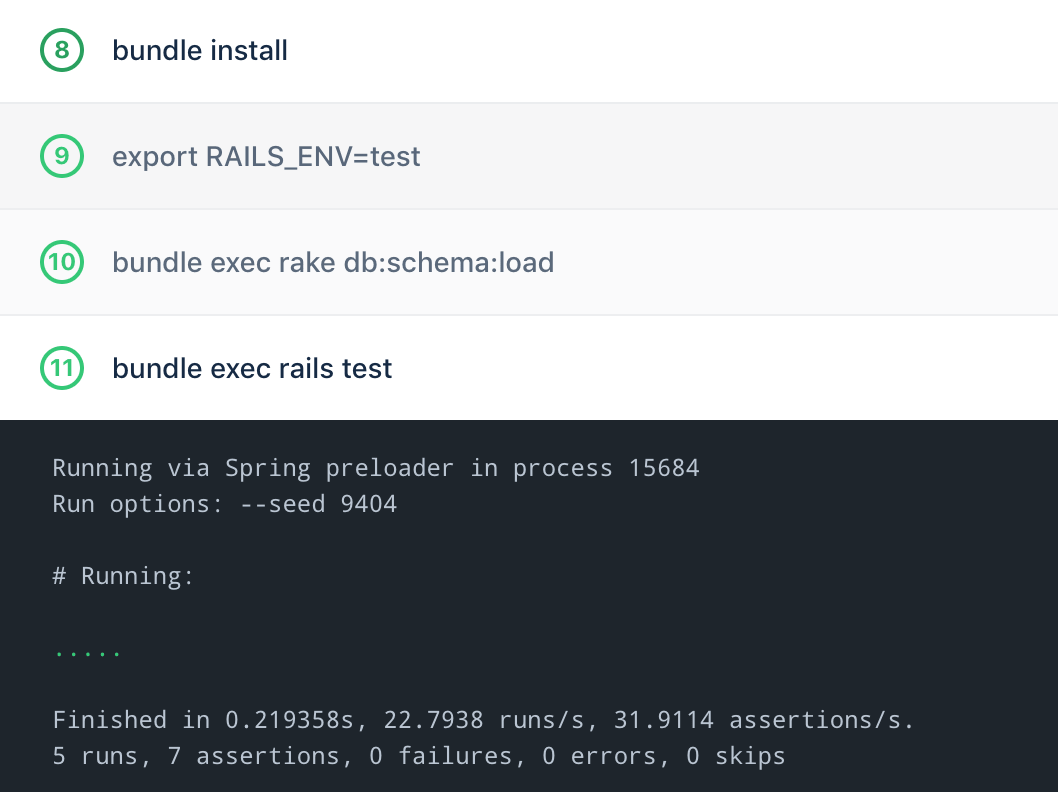
In Codeship there's a dropdown to pre-populate a setup for Ruby on Rails, and you can customize the commands if you want to. The only thing we need to kick off the test suite on our builds is supply the command to run the tests: bundle exec rails test.

This time when the build gets run our test suite will be run as well, and if it passes it will continue with the deploy:
Typically the workflow would look something like this:
- Push or merge to
stagingor any otheroriginbranch runs the tests on CI - Push or merge to
masterruns the tests on CI, and if they pass, deploys the app.
Extras
Outside of the app pipeline itself there are other very important services like uptime monitoring, error tracking, and logging. These tools alert you to problems with your application and help diagnose and solve the problem itself. If your alerting and diagnostics are really good, you can sometimes fix a problem before the user even tells you about it. It's always fun to just reply with, "it's already fixed!" :)
If you intend to have an app in the wild for any reasonable amount of time, these are fantastic services to set up.
Monitoring
It's great to be notified when your site or app is down without your end user having to report it.
For simple side-projects, I like to use UptimeRobot. It's simple and free, and I just have it set to email me when my site is down:

Error tracking
Similar to your site being down, you don't want to hear from users that they've received an error and you had no idea that error was even occurring in the first place!
It's also very frustrating to get vague user feedback about what the problem is. How can you fix the problem if you don't even know what the problem is?
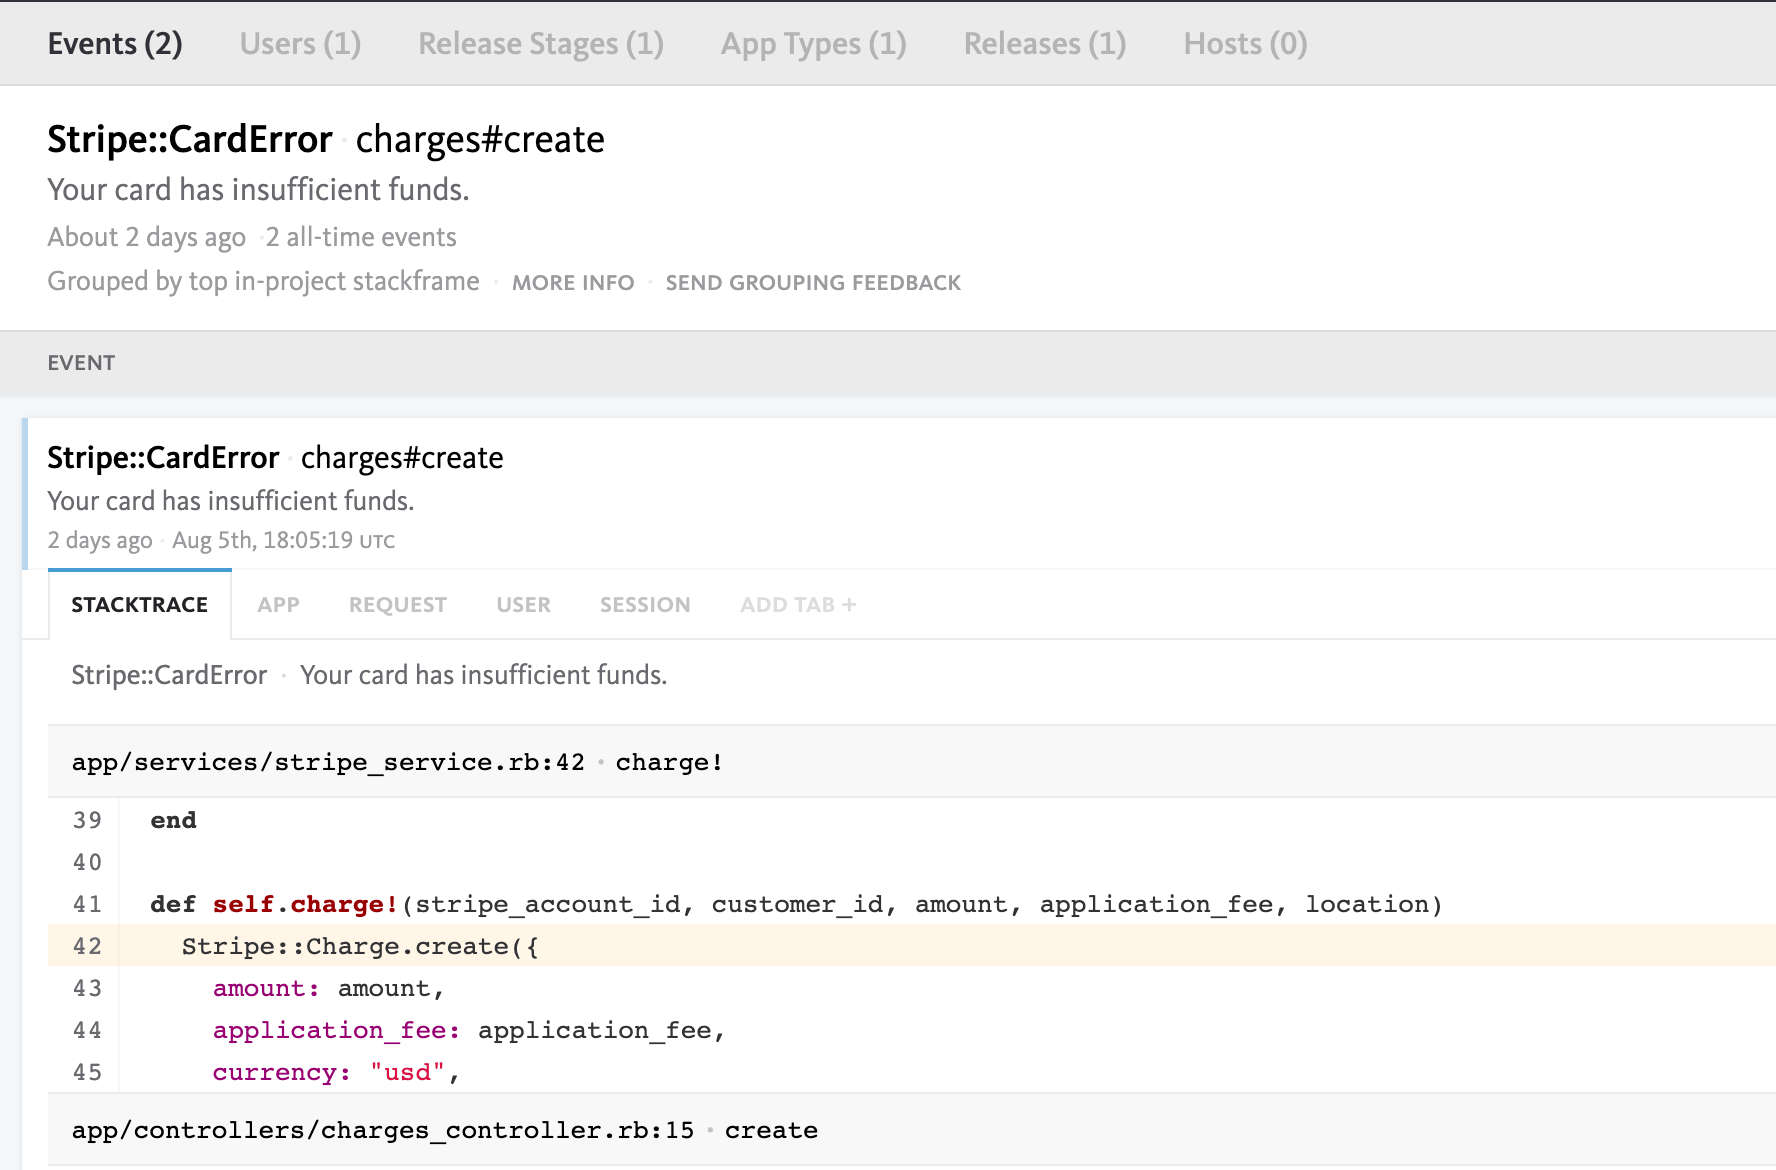
This is where error tracking services come in. For my personal projects I like to use Bugsnag, but there are again many options to choose from.
I like to have errors post to a personal Slack I've made and notify me on new occurrences. It makes awareness about errors and fixing those errors a breeze.
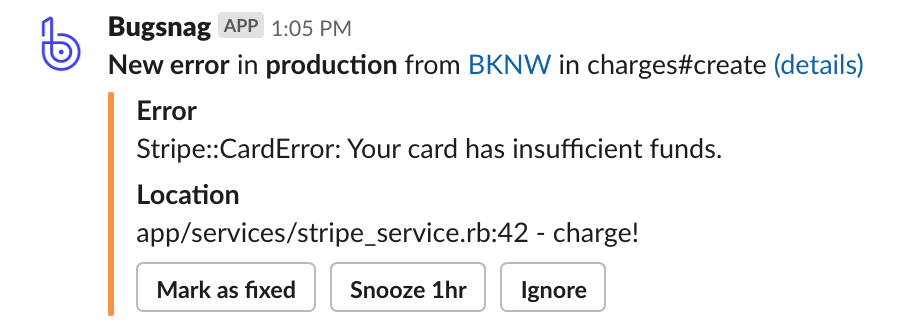
Once I'm notified I can check for the details in Bugsnag and see incredibly useful info like the line that caused the error and the particular user that the error happened to:
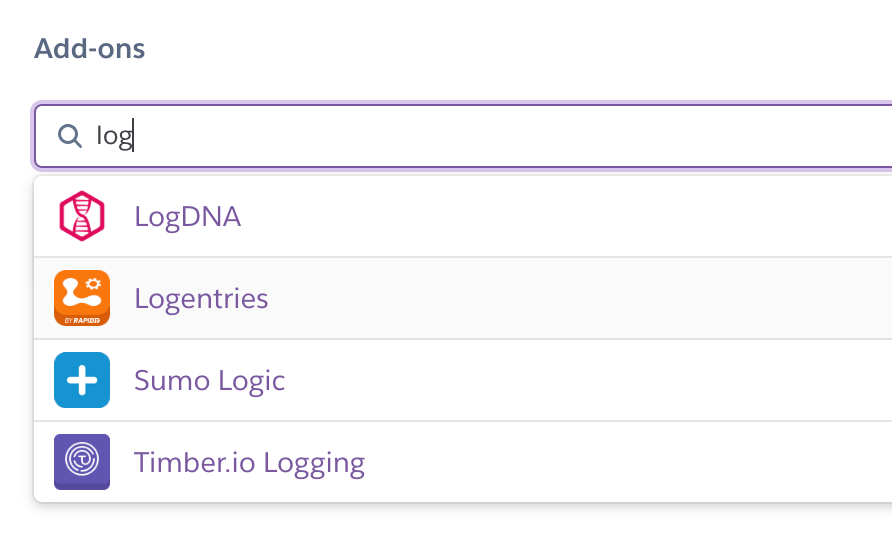
Logging
Another very useful tactic is to view the logs from your application. If you use Heroku, adding a logging application to store and present the logs your app creates is very easy—you just need to add a logging addon.
Sometimes issues with your apps aren't caused by exceptions or errors thrown from the code, but by slow or spammed requests that tie up your server's resources. These things can often by identified by viewing the logs.
07 Aug 2019 15:31:19.277239 <190>1 2019-08-07T20:31:18.534556+00:00 app web.1 - - I, [2019-08-07T20:31:18.534483 #4] INFO -- : [6ef028e4-e5f0-4642-a55a-58ba18ed4485] Completed 200 OK in 4ms (Views: 2.6ms | ActiveRecord: 1.3ms)
07 Aug 2019 15:31:19.277255 <190>1 2019-08-07T20:31:18.533954+00:00 app web.1 - - D, [2019-08-07T20:31:18.533486 #4] DEBUG -- : [6ef028e4-e5f0-4642-a55a-58ba18ed4485] [1m[36mUser Load (1.3ms)[0m [1m[34mSELECT "users".* FROM "users"[0m
07 Aug 2019 15:31:19.277222 <190>1 2019-08-07T20:31:18.528106+00:00 app web.1 - - I, [2019-08-07T20:31:18.528027 #4] INFO -- : [6ef028e4-e5f0-4642-a55a-58ba18ed4485] Processing by UsersController#index as JSON
07 Aug 2019 15:31:19.162251 <190>1 2019-08-07T20:31:18.527347+00:00 app web.1 - - I, [2019-08-07T20:31:18.527226 #4] INFO -- : [6ef028e4-e5f0-4642-a55a-58ba18ed4485] Started GET "/users.json" for 68.97.201.238 at 2019-08-07 20:31:18 +0000
07 Aug 2019 15:31:18.942309 <158>1 2019-08-07T20:31:18.533598+00:00 heroku router - - at=info method=GET path="/users.json" host=blog-sample-api.herokuapp.com request_id=6ef028e4-e5f0-4642-a55a-58ba18ed4485 fwd="68.97.201.238" dyno=web.1 connect=1ms service=10ms status=304 bytes=217 protocol=http
Slack
Finally, there's Slack. Slack is a great place to be a central dumping ground for all of these services and more. I have a personal slack that I use for reporting on my side projects, and it really helps me stay on top of what is happening with my apps. Also, almost every major company in the world probably uses Slack at this point, so it'd be a good thing to be accustomed too.
Conclusion
DevOps is its own world—and this post is far from exhaustive—but I hope this introduction gives you some confidence to setup some mature development practices on your own personal apps.
Every mature development environment will have some version of these things in place, so like all of the previous topics, having familiarity with them and some practical experience using them will go a long ways during the interviewing and job-searching process.
That's all for this one. Feel free to reach out to me on twitter (@johnmosesman) if you have any questions on this or any other development topic.
John